Replacing a bathroom vanity top is a DIY project that can significantly enhance the aesthetic appeal of your bathroom while also providing functional improvements. Whether you’re looking to update an outdated vanity or customize your space to better suit your style, replacing the vanity top can make a noticeable difference. In this comprehensive guide, we’ll walk you through the step-by-step process of replacing a bathroom vanity top, from preparation to completion.

Before diving into the details of the replacement process, it’s essential to understand the significance of a bathroom vanity top. The vanity top serves as both a functional surface for daily grooming tasks and a focal point of the bathroom’s design. By replacing an old or damaged vanity top, you can revitalize the entire space and create a more visually appealing environment.
Benefits of Replacing a Bathroom Vanity Top
- Enhanced Aesthetic Appeal: A new vanity top can instantly refresh the look of your bathroom, making it more stylish and modern.
- Improved Functionality: Upgrading to a larger or more functional vanity top can provide additional storage space and surface area for toiletries.
- Increased Property Value: Renovating the bathroom, including replacing the vanity top, can increase the overall value of your home.
Preparing for the Replacement Process
Gathering Tools and Materials
- Tools:
- Tape measure: For accurately measuring the dimensions of the existing vanity top and the new one.
- Screwdriver: To disconnect the water supply lines and remove any fixtures attached to the old vanity top.
- Razor knife: For cutting through the caulking that secures the old vanity top to the walls.
- Caulking gun: To apply new caulk and create a watertight seal around the edges of the new vanity top.
- Level: For ensuring that the new vanity top is installed evenly and securely.
- Materials:
- New vanity top: Choose a replacement vanity top that fits the dimensions of your existing vanity and complements your bathroom’s design.
- Sink bowl (if required): If the new vanity top does not come with an integrated sink, you’ll need to purchase a separate sink bowl that fits the countertop.
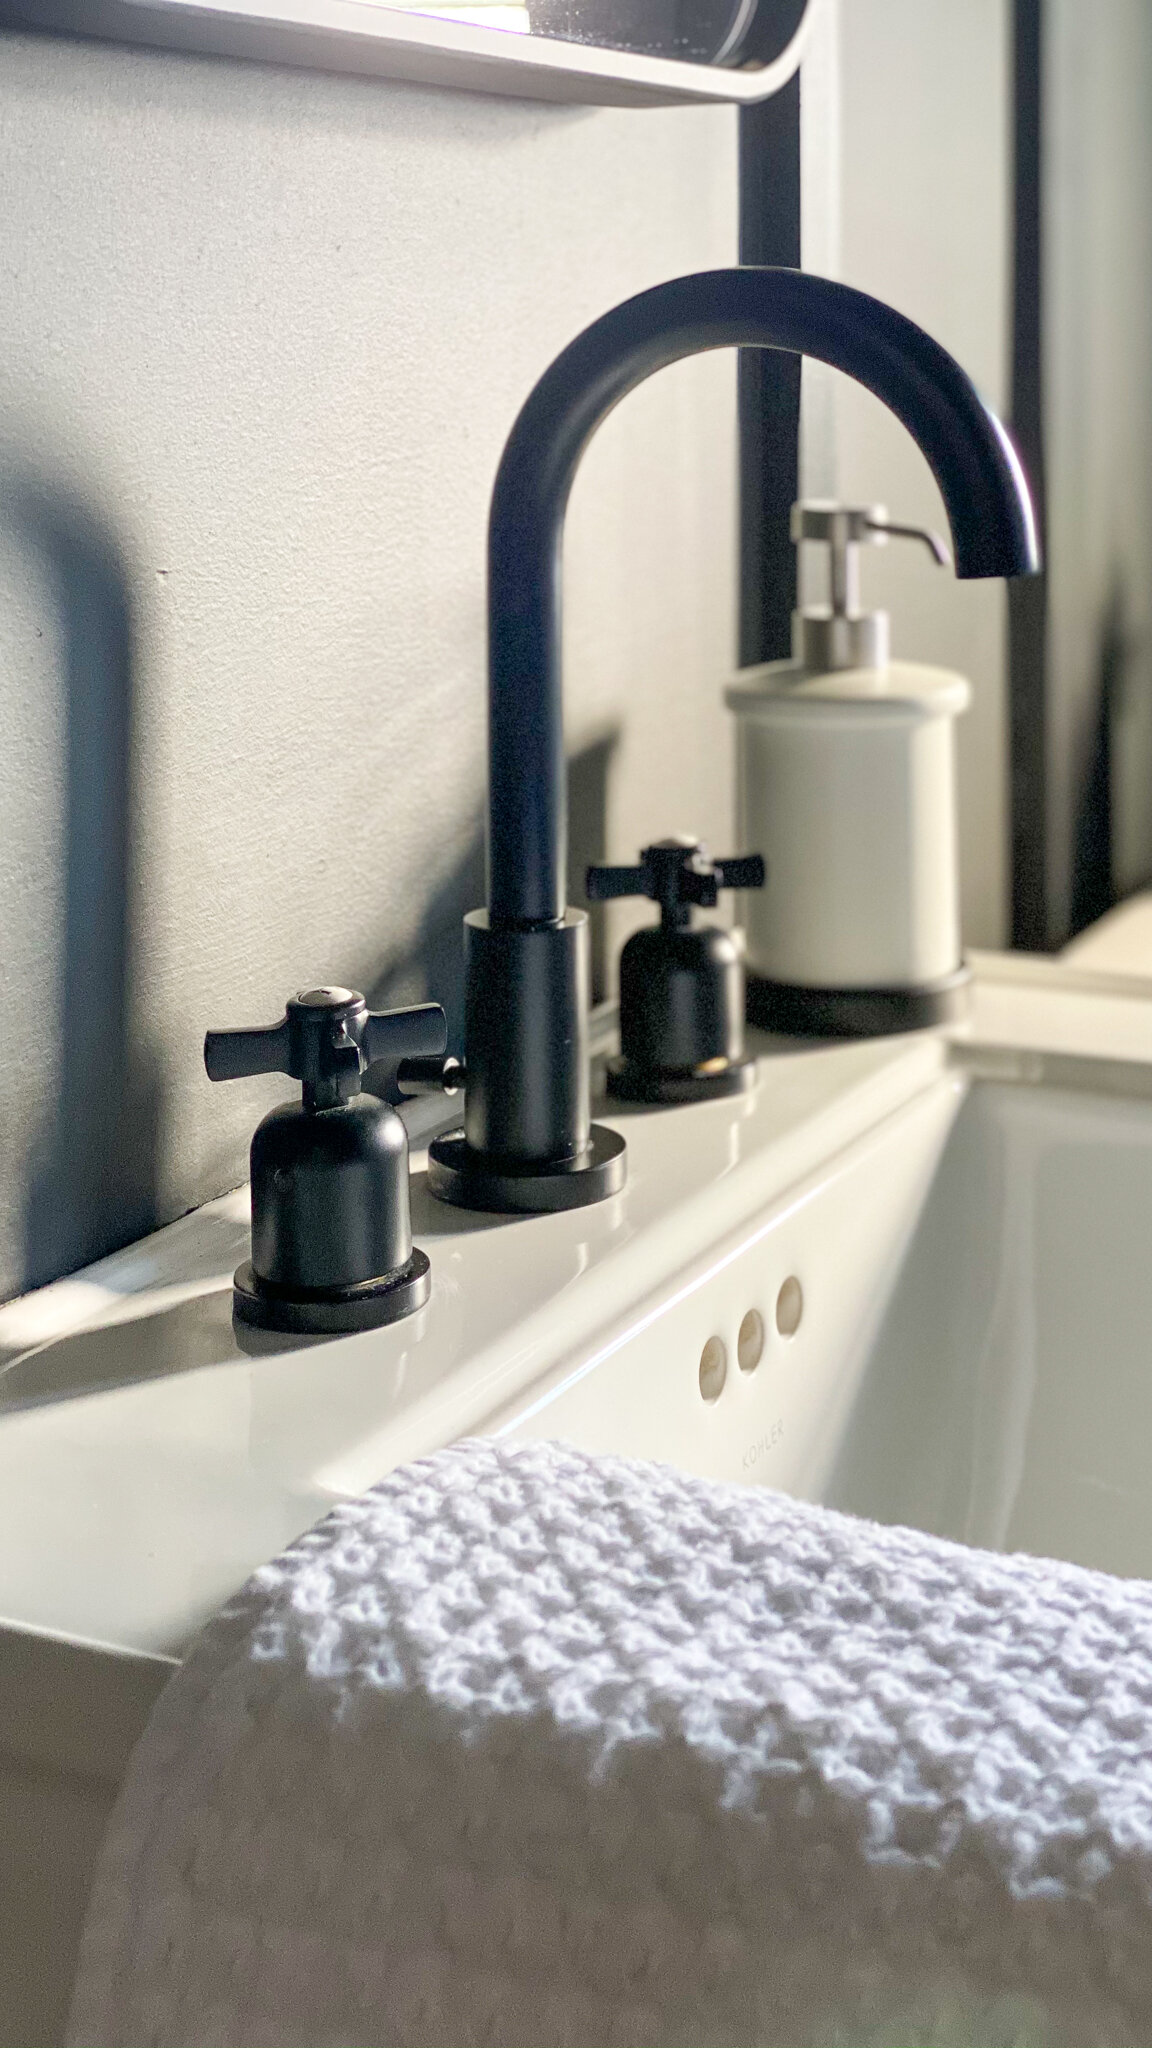
- Faucet: Select a faucet that complements the style of your new vanity top and meets your functional needs.
- Caulk: Use high-quality caulking to seal the edges of the new vanity top and prevent water damage.
- Bucket and towel: To catch any water that may spill during the removal process and to clean up any messes.
Assessing the Existing Vanity and Workspace
- Cabinet Base: Inspect the cabinet base beneath the existing vanity top to ensure that it is structurally sound and free of water damage or mold.
- Plumbing Fixtures: Check the condition of the water supply lines, P-trap, and any other plumbing fixtures connected to the vanity top. Replace any damaged or worn components as needed.
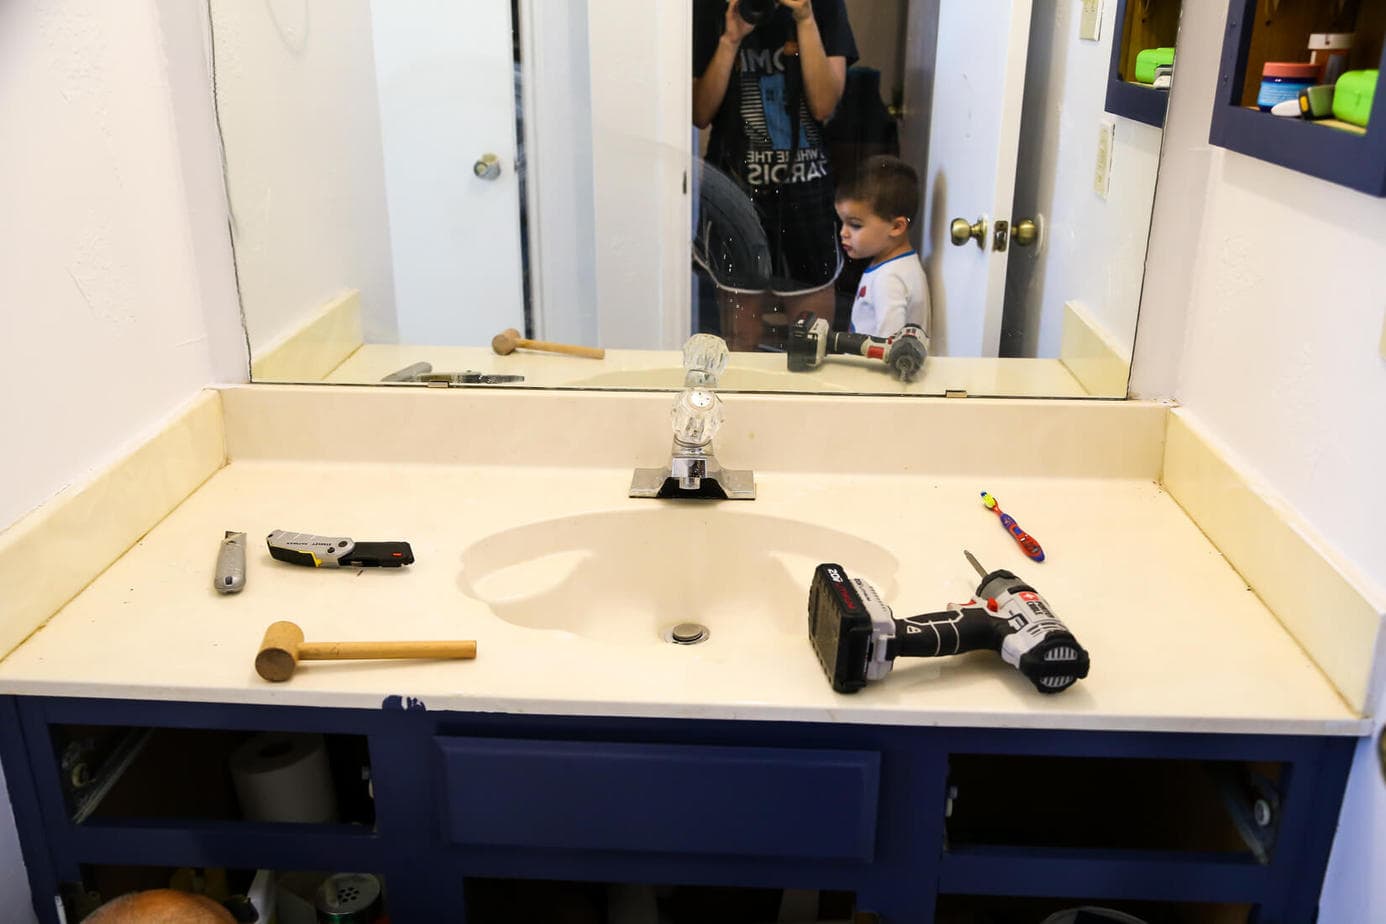
- Workspace: Clear the area around the bathroom vanity to create a safe and accessible workspace. Remove any toiletries, towels, or other items that may obstruct the removal and installation process.
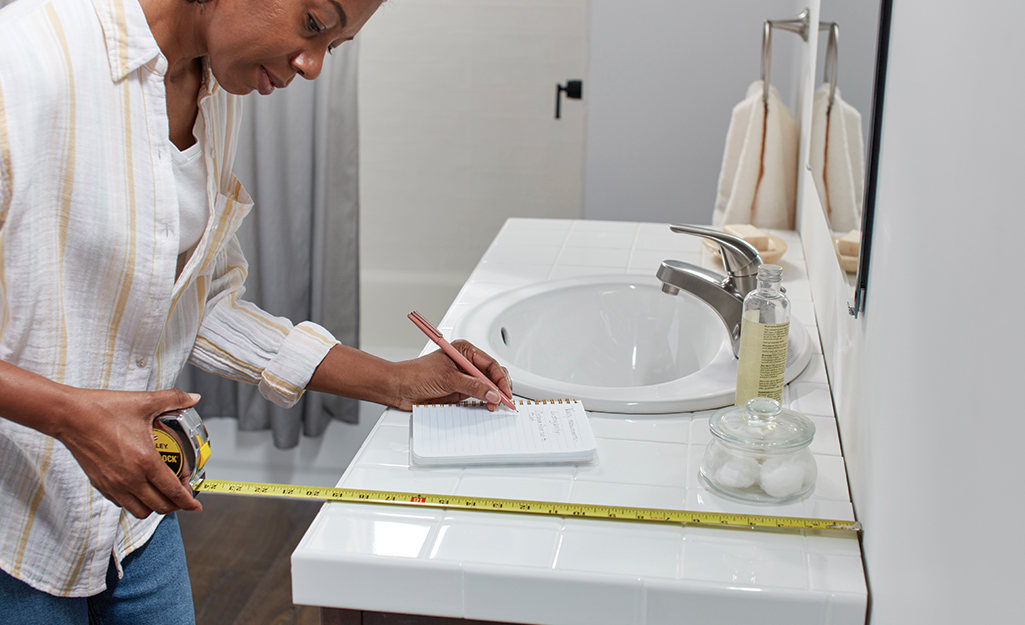
Step 1: Measure the Existing Vanity Top
Tools Needed
- Tape Measure: A tape measure is essential for taking precise measurements of the length, width, and depth of the current vanity top. Make sure to use a tape measure with clear markings and a sturdy construction to ensure accuracy.
- Clear the Area: Before taking measurements, remove any items or clutter from the vanity top to ensure unobstructed access.
- Measure Length and Width: Use the tape measure to measure the length and width of the vanity top from edge to edge. Start by measuring the length along one side of the vanity, then repeat the process for the width along the opposite side. Record the measurements accurately.
- Measure Sink Dimensions (if applicable): If the existing vanity top includes a sink, measure the dimensions of the sink opening, including its length, width, and depth. This information will be helpful when selecting a replacement vanity top with a compatible sink.
- Note Any Irregularities: While measuring, pay attention to any irregularities or protrusions on the vanity top, such as backsplashes or built-in features. These details will inform your choice of replacement vanity top and ensure a proper fit.
Tips for Accurate Measurement
- Double-Check Measurements: Take multiple measurements of each dimension to confirm accuracy. Inconsistencies could indicate errors in measurement or irregularities in the vanity top.
- Measure from Edge to Edge: When measuring the length and width of the vanity top, start from one edge and extend the tape measure to the opposite edge. Avoid measuring from the midpoint, as this may lead to inaccuracies.
- Account for Clearance: If the existing vanity top is installed against walls or other fixtures, account for clearance when measuring. Leave a small margin to accommodate any obstacles and ensure a proper fit for the replacement vanity top.
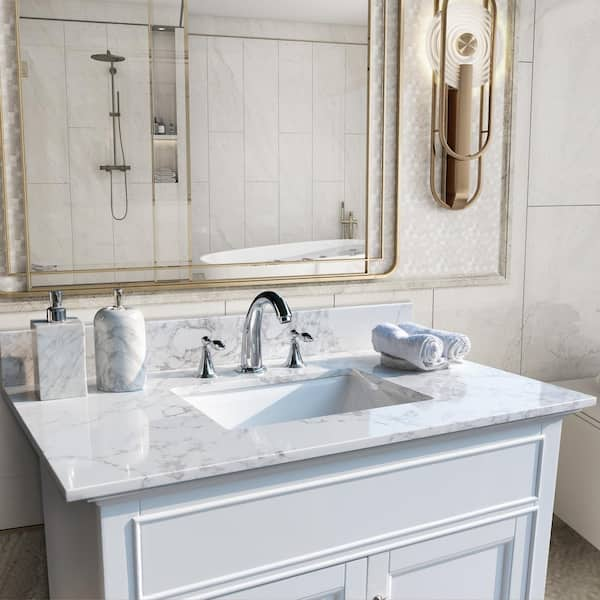
Step 2: Select a New Vanity Top
- Size and Dimensions: The replacement vanity top should match the length and width of the existing vanity to ensure a proper fit. Additionally, consider the depth of the vanity top and any overhangs that may affect its placement.
- Material: Vanity tops are available in a variety of materials, including marble, granite, quartz, laminate, and solid surface. Each material offers different aesthetics, durability, and maintenance requirements. Choose a material that suits your style preferences and budget while also considering factors such as resistance to water, stains, and scratches.
- Sink Configuration: Determine whether you need a vanity top with an integrated sink or if you prefer to install a separate sink bowl. Consider the number of sinks required (single or double) and their placement on the vanity top. Ensure that the sink configuration matches your functional needs and space limitations.
- Color and Finish: Select a vanity top color and finish that complements the existing decor of the bathroom. Whether you prefer a classic white vanity top, a bold color statement, or a natural stone look, choose a finish that enhances the overall aesthetic of the space.
- Edge Profile: Pay attention to the edge profile of the vanity top, as it can add visual interest and sophistication to the bathroom. Common edge profiles include straight, bullnose, beveled, and ogee. Choose an edge profile that complements the style of the vanity top and the overall design theme of the bathroom.
Tips for Selection
- Take Samples Home: If possible, obtain samples of different vanity top materials and colors to compare them against the existing decor of the bathroom. This allows you to visualize how each option will look in the space.
- Consider Maintenance Requirements: Evaluate the maintenance requirements of each vanity top material and choose one that aligns with your lifestyle and cleaning preferences. Some materials may require regular sealing or special care to maintain their appearance.
- Consult with Experts: Seek advice from professionals at home improvement stores or consult with interior designers to explore all available options and make an informed decision. They can provide valuable insights and recommendations based on your specific needs and preferences.
Step 3: Disconnect Water and Plumbing
:max_bytes(150000):strip_icc()/where-to-shut-off-the-water-2718723-hero-98400ef1c43741ce8719818bfe804466.jpg)
Tools Needed
- Screwdriver: Use a screwdriver to loosen and remove any screws or fasteners securing the water supply lines and plumbing fixtures.
- Bucket: Place a bucket beneath the P-trap to catch any water that may spill during the disconnection process.
- Towel: Use a towel to wipe up any spills or moisture and keep the work area clean and dry.
Steps to Follow
- Locate the Shut-Off Valve: Identify the shut-off valves for the hot and cold water supply lines beneath the sink. These valves are typically located on the wall or floor near the base of the vanity.
- Turn Off the Water Supply: Use a screwdriver to turn the shut-off valves clockwise to shut off the water supply. This will prevent water from flowing into the plumbing fixtures during the disconnection process.
- Disconnect the Water Supply Lines: Use a screwdriver to loosen the nuts or connectors securing the water supply lines to the shut-off valves and the faucet. Once loosened, carefully remove the water supply lines and set them aside.
- Remove the P-Trap: Locate the P-trap, which is the curved pipe beneath the sink that connects the drain to the plumbing system. Place a bucket beneath the P-trap to catch any water, then use a screwdriver to loosen the nuts or connectors securing the P-trap to the drain and the tailpiece. Once loosened, carefully remove the P-trap and set it aside.
Tips for Safe Disconnection
- Use Caution: When working with water and plumbing fixtures, exercise caution to avoid injury or damage. Take your time and work carefully to prevent accidents or mishaps.
- Label Connections: If necessary, label the water supply lines and plumbing fixtures to make reconnection easier later on. This can help ensure that everything is properly aligned and connected during the installation of the new vanity top.
- Inspect for Damage: While disconnecting the water and plumbing fixtures, take the opportunity to inspect them for any signs of damage or wear. Replace any damaged components as needed to prevent future issues.
Step 4: Cut the Wall Caulk
The caulking along the edges of the vanity top serves as a sealant to prevent water from seeping between the vanity top and the wall. By cutting through the caulking, you break the seal and facilitate the removal of the old vanity top without damaging the walls or causing unnecessary strain on the fixtures.
Tools Needed
- Razor Knife: A sharp razor knife or utility knife is ideal for cutting through the caulking with precision. Ensure the blade is sharp to achieve clean cuts without damaging the surrounding surfaces.
Steps to Follow
- Inspect the Caulk: Begin by inspecting the edges of the vanity top where it meets the wall. Look for the line of caulking that seals the vanity top in place. Note any areas where the caulking appears damaged or deteriorated.
- Prepare the Razor Knife: Ensure that the blade of the razor knife is sharp and free of debris. If necessary, replace the blade to achieve clean and precise cuts.
- Score the Caulk: Starting at one end of the vanity top, carefully insert the razor knife between the edge of the vanity top and the wall. Apply gentle pressure to the knife as you move it along the length of the caulking line, scoring the caulking as you go.
- Repeat as Needed: Continue scoring the caulking along the entire length of the vanity top, working in small sections to ensure thorough coverage. Take your time and avoid rushing to achieve clean and accurate cuts.
- Check for Loose Caulk: Once you’ve scored the caulking, check for any areas where the caulking has become loose or separated from the wall. Use the razor knife to remove any remaining bits of caulking, ensuring a smooth and clean surface.
Tips for Cutting Caulk
- Work Carefully: Exercise caution when using the razor knife to avoid damaging the walls or surrounding surfaces. Take your time and work methodically to achieve clean and precise cuts.
- Use Proper Technique: Hold the razor knife at a slight angle to the surface of the wall, allowing the blade to penetrate the caulking without gouging the surface. Apply steady pressure and use smooth, controlled movements to score the caulking evenly.
- Inspect for Damage: After cutting the caulking, inspect the walls and surrounding surfaces for any signs of damage or wear. Address any issues promptly to ensure a smooth installation of the new vanity top.
Step 5: Lift Off the Existing Countertop
:max_bytes(150000):strip_icc()/replacing-existing-surface-mounted-sink-1824896-02-ce551063a1a2426a8e67e701d9893e42.jpg)
Steps to Follow
- Ensure Proper Preparation: Before lifting off the countertop, ensure that the area surrounding the vanity is clear of any obstacles or debris. This provides ample space to work and prevents accidents or damage to nearby objects.
- Apply Gentle Pressure: With the caulking cut and the plumbing disconnected, apply gentle upward pressure to the edges of the countertop. Start at one end and work your way along the length of the countertop, gradually lifting it away from the vanity base.
- Work Methodically: Lift the countertop slowly and evenly, taking care not to force it or apply excessive pressure. Work methodically, using both hands to support and guide the countertop as it is lifted.
- Check for Resistance: As you lift the countertop, check for any areas where it may be stuck or resistant to movement. If necessary, use a pry bar or putty knife to gently pry away any stubborn sections of caulking or adhesive.
- Set Aside the Countertop: Once the countertop has been lifted free from the vanity base, set it aside in a safe and secure location. Take care to avoid placing it on any delicate surfaces or objects that could be damaged.
Tips for Lifting Off the Countertop
- Work Carefully: Take your time and work carefully to avoid damaging the vanity base or the walls. Apply gentle pressure and use controlled movements to lift off the countertop evenly.
- Inspect for Damage: After removing the countertop, inspect the vanity base and the surrounding walls for any signs of damage or wear. Address any issues promptly to ensure a smooth installation of the new vanity top.
- Dispose of the Old Countertop Properly: If the old countertop is no longer needed, dispose of it properly according to local regulations. Consider recycling or donating it if possible to minimize waste.
Step 6: Lay Down the New Countertop

Steps to Follow
- Prepare the Vanity Base: Ensure that the vanity base is clean, dry, and free of any debris or obstacles that could interfere with the installation process. Remove any old caulking or adhesive residue from the top of the vanity base to create a smooth surface for the new countertop.
- Position the New Countertop: Carefully lift the new countertop into position, aligning it with the edges of the vanity base and the walls. Take care to center the countertop evenly on the base and ensure that it sits flush against the back wall.
- Check for Proper Alignment: Use a level to check the alignment of the new countertop, ensuring that it is horizontal and level from front to back and side to side. Make any necessary adjustments to ensure a precise fit and alignment.
- Secure the Countertop: Once the countertop is properly positioned, secure it to the vanity base using appropriate fasteners or adhesive. Follow the manufacturer’s instructions for securing the countertop, ensuring that it is anchored securely in place.
- Check for Stability: Test the stability of the countertop by gently pressing down on its surface and checking for any movement or wobbling. If necessary, reinforce the installation by adding additional fasteners or adhesive as needed.
Tips for Laying Down the New Countertop
- Measure Twice, Cut Once: Double-check the measurements and ensure that the new countertop fits properly onto the vanity base before securing it in place. Avoid making any irreversible cuts or modifications until you are certain of the fit.
- Use Proper Anchoring Techniques: Depending on the type of countertop material and the manufacturer’s recommendations, use appropriate fasteners or adhesive to secure the countertop to the vanity base. Follow the manufacturer’s instructions carefully to ensure a secure and durable installation.
- Consider Waterproofing: If the new countertop is made of porous materials such as natural stone or wood, consider applying a waterproof sealant to protect it from moisture and staining. This can help prolong the lifespan of the countertop and maintain its appearance over time.
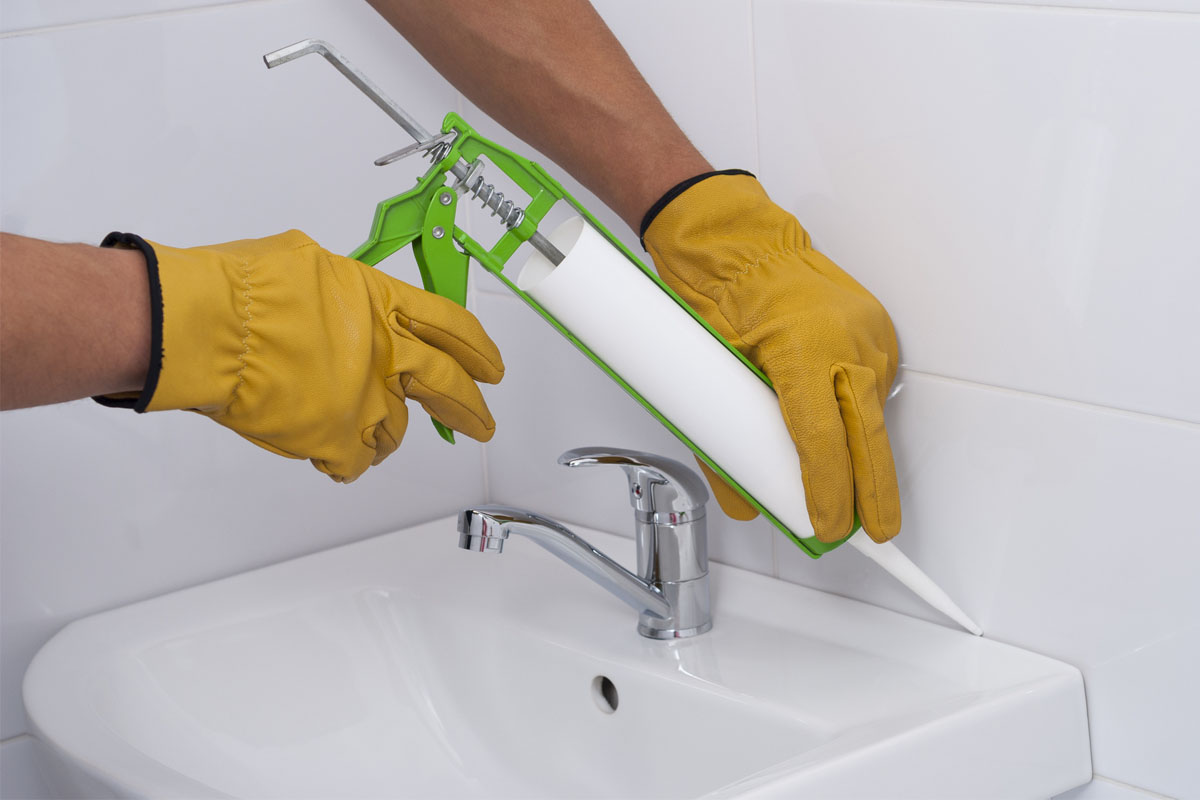
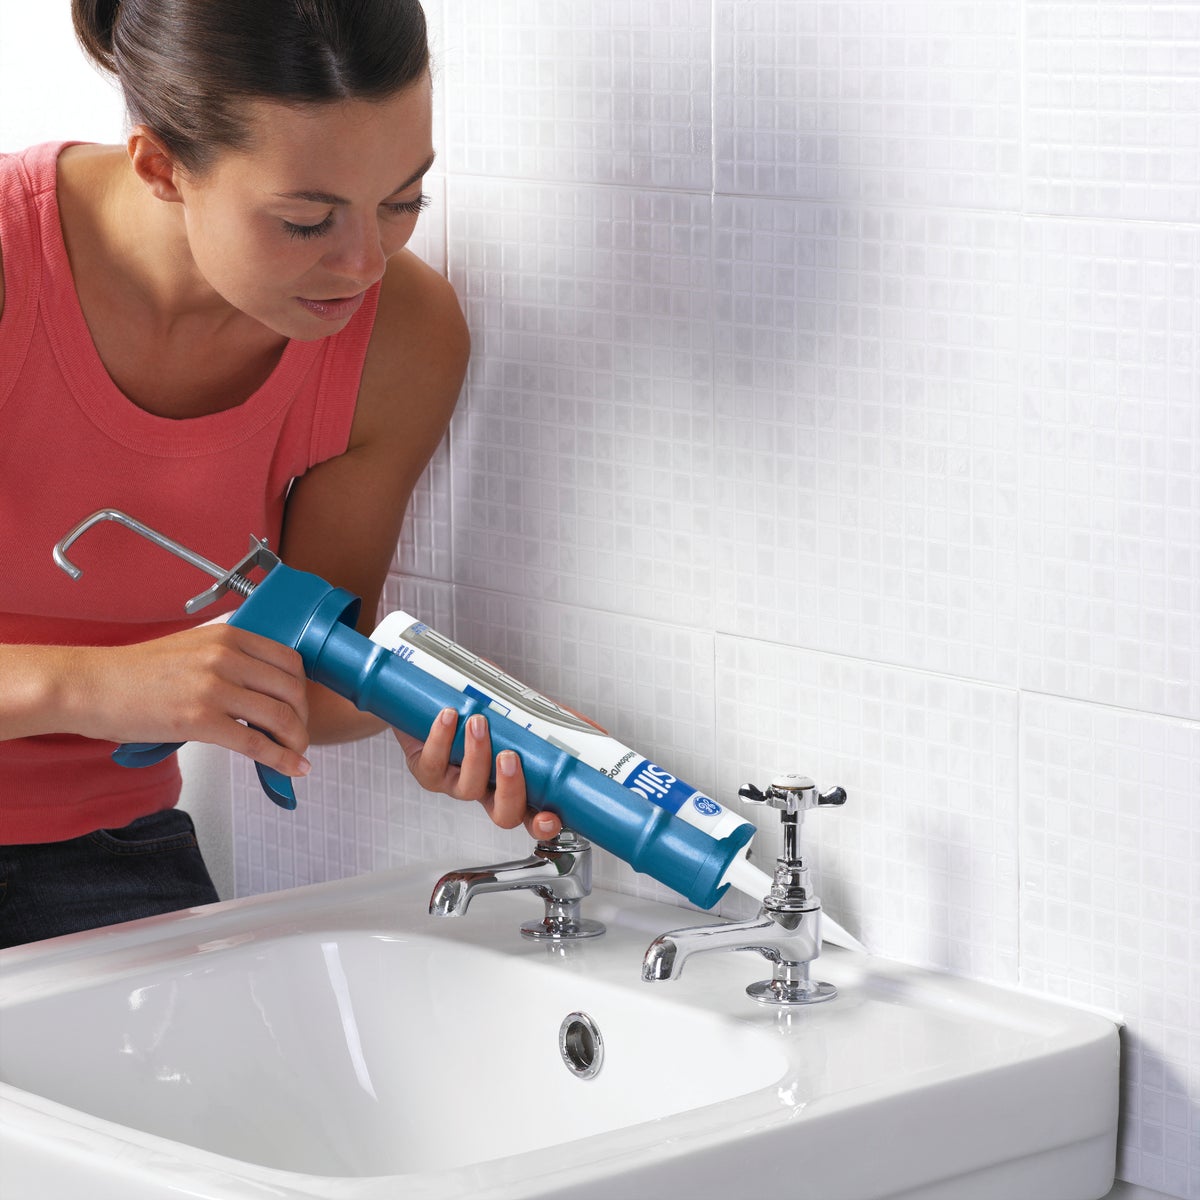
Step 7: Caulk the Edges
Steps to Follow
- Select the Right Caulk: Choose a high-quality silicone or acrylic caulk that is specifically formulated for use in bathrooms and kitchens. Consider the color of the caulk to ensure it complements the color of the countertop and the surrounding walls.
- Prepare the Surface: Before applying the caulk, ensure that the edges of the countertop and the walls are clean, dry, and free of any debris or residue. Use a damp cloth to remove any dust or dirt, and allow the surface to dry completely before proceeding.
- Load the Caulk Gun: Load the caulk gun with the chosen caulk cartridge, following the manufacturer’s instructions. Cut the tip of the caulk cartridge at a slight angle to create a small opening for dispensing the caulk.
- Apply the Caulk: Starting at one end of the countertop, hold the caulk gun at a 45-degree angle and apply a steady bead of caulk along the edge of the countertop where it meets the wall. Use a smooth, continuous motion to ensure even coverage.
- Smooth the Caulk: After applying the caulk, use a caulk smoothing tool or a wet finger to smooth out the bead of caulk and remove any excess. This helps create a neat and professional-looking finish.
- Allow to Dry: Allow the caulk to dry completely according to the manufacturer’s instructions before using the countertop or exposing it to water. This typically takes 24 hours, but may vary depending on the type of caulk used and environmental conditions.
Tips for Caulking the Edges
- Work in Small Sections: Apply the caulk in small sections to prevent it from drying out before you have a chance to smooth it. This helps ensure a consistent bead of caulk and a uniform finish.
- Use Masking Tape: If you’re concerned about creating a neat caulk line, use masking tape to mask off the edges of the countertop and the walls before applying the caulk. This helps create clean, straight lines and prevents excess caulk from smudging onto the surrounding surfaces.
- Check for Gaps: After caulking the edges, inspect the countertop carefully for any gaps or areas where the caulk may have missed. Fill in any gaps or touch up any imperfections with additional caulk as needed.
Step 8: Install the New Sink
Steps to Follow
- Prepare the Sink: Before installation, ensure that the new sink is clean and free of any debris or residue. Inspect the sink for any damage or defects, and address any issues before proceeding with the installation.
- Position the Sink: Carefully position the sink over the pre-cut opening in the new countertop, ensuring that it aligns properly with the drain opening and any pre-drilled faucet holes. Take care to center the sink evenly within the opening.
- Apply Caulk (if necessary): If the sink requires caulking to create a watertight seal, apply a bead of silicone caulk around the perimeter of the sink rim. Ensure that the caulk is applied evenly and covers the entire edge of the sink.
- Lower the Sink into Place: Once the caulk has been applied (if necessary), lower the sink into the pre-cut opening in the countertop. Press down firmly to ensure that the sink is seated securely and evenly against the countertop surface.
- Secure the Sink: Depending on the type of sink and countertop material, secure the sink to the countertop using appropriate fasteners or mounting hardware. Follow the manufacturer’s instructions for securing the sink, ensuring that it is anchored securely in place.
- Connect the Plumbing: Once the sink is securely installed, reconnect the plumbing fixtures, including the P-trap and water supply lines. Use a screwdriver to tighten any fittings or connectors, ensuring a snug and leak-free connection.
- Test for Leaks: After connecting the plumbing fixtures, turn on the water supply and check for any leaks or drips around the sink and plumbing connections. Tighten any fittings or connections as needed to address any leaks.
Tips for Installing the New Sink
- Follow Manufacturer’s Instructions: Always follow the manufacturer’s instructions and recommendations for installing the sink. This ensures proper installation and prevents damage to the sink or countertop.
- Use Waterproof Caulk: If caulking is required to seal the sink to the countertop, use a high-quality waterproof silicone caulk. This creates a durable and watertight seal that prevents leaks and water damage.
- Check Alignment: Before securing the sink in place, double-check the alignment to ensure that it is centered properly within the opening and aligned with the plumbing fixtures. Adjust as needed to achieve proper alignment.
Step 9: Connect Water and Plumbing

Steps to Follow
- Prepare the Plumbing Fixtures: Before connecting the water supply lines, ensure that the plumbing fixtures, including the P-trap and faucet, are clean and free of any debris or residue. Inspect the fixtures for any damage or defects, and address any issues before proceeding with the connection.
- Reconnect the Water Supply Lines: Using a screwdriver, reconnect the water supply lines to the shut-off valves located beneath the sink. Tighten the fittings securely to ensure a snug connection and prevent leaks.
- Check for Leaks: Once the water supply lines are reconnected, turn on the shut-off valves and check for any leaks or drips around the connections. Inspect the fittings and connections carefully, and tighten any loose fittings as needed to address leaks.
- Reconnect the P-Trap: Reattach the P-trap, which is the curved pipe beneath the sink that connects the drain to the plumbing system. Use a screwdriver to tighten the nuts or connectors securely, ensuring a watertight seal.
- Test the Drain: After reconnecting the P-trap, test the drain by running water down the sink and checking for any leaks or drainage issues. Ensure that the water flows smoothly and drains properly without any backups or blockages.
Tips for Connecting Water and Plumbing
- Inspect for Damage: Before reattaching the plumbing fixtures, thoroughly inspect them for any signs of damage or wear. Replace any damaged components to prevent leaks and ensure proper functionality.
- Use Thread Sealant: For threaded connections, consider using thread sealant or plumber’s tape to ensure a watertight seal and prevent leaks. Apply the sealant to the threads of the fittings before tightening them securely.
- Test for Leaks: After reconnecting the water supply lines and plumbing fixtures, thoroughly test the connections for leaks by running water down the sink and checking for any signs of moisture or drips. Address any leaks promptly to prevent water damage.
Final Touches and Considerations
:max_bytes(150000):strip_icc()/replace-and-install-bathroom-vanity-1824869-05-732575143d214f8a882634cff96261f0.jpg)
- Inspect the Installation: After completing the installation of the new vanity top and connecting the plumbing fixtures, inspect the entire installation carefully. Look for any signs of damage, leaks, or imperfections that may need to be addressed.
- Make Adjustments: If necessary, make any adjustments to the installation to ensure that everything is properly aligned and functioning correctly. This may include tightening loose fittings, adjusting the positioning of the sink or countertop, or addressing any remaining leaks or drainage issues.
- Clean Up: Once the installation is complete and any adjustments have been made, clean up the work area and remove any debris or leftover materials. Wipe down the vanity top, sink, and surrounding surfaces to remove any dust or dirt and ensure a clean and polished finish.
- Apply Sealant (if necessary): Depending on the type of countertop material and the manufacturer’s recommendations, consider applying a sealant or protective coating to the vanity top. This helps protect the surface from moisture, stains, and damage, prolonging its lifespan and maintaining its appearance.
- Consider Additional Accessories: Take this opportunity to consider any additional accessories or features that may enhance the functionality or appearance of the vanity top. This could include installing a backsplash, adding storage organizers, or incorporating decorative elements to personalize the space.
- Test Functionality: Before considering the installation complete, test the functionality of the vanity top by using the sink and running water to ensure that everything is working properly. Check for any remaining leaks, drainage issues, or other concerns, and address them as needed.
- Review Maintenance Guidelines: Familiarize yourself with the maintenance guidelines for the new vanity top, including any specific care instructions or recommendations provided by the manufacturer. This helps ensure that the vanity top remains in good condition and continues to function properly over time.
Tips for Final Touches and Considerations
- Take Your Time: Don’t rush through the final touches and considerations. Take the time to thoroughly inspect the installation and address any remaining tasks or concerns before considering the project complete.
- Consult Professionals: If you encounter any issues or concerns during the installation process, don’t hesitate to seek assistance from professionals. They can provide guidance and expertise to help resolve any problems and ensure a successful outcome.
- Maintain Regular Maintenance: Once the replacement process is complete, continue to maintain the vanity top regularly by following the recommended care and maintenance guidelines. This helps preserve its appearance and functionality over time, ensuring long-term satisfaction with the investment.
Conclusion
Replacing a bathroom vanity top is a rewarding DIY project that can transform the look and functionality of your bathroom. By following the step-by-step guide outlined above, you can successfully replace your old vanity top with a new one that reflects your style and meets your needs. With proper preparation and attention to detail, you can achieve professional-quality results and enjoy your updated bathroom for years to come.