Maintaining a clean bathroom is essential not only for aesthetic purposes but also for your health and the longevity of your home. One often overlooked component of bathroom cleanliness is the exhaust fan. Properly functioning bathroom fans help to remove excess moisture, prevent mold and mildew growth, and protect against damage to surfaces like paint, metal, and wood. But how often should you clean your bathroom fan to ensure it operates efficiently and effectively? In this comprehensive guide, we’ll explore the factors influencing the frequency of bathroom fan cleaning and provide practical tips for keeping your fan in top condition.
Understanding the Importance of Cleaning Bathroom Fans

Moisture Control and Prevention of Damage
Bathroom fans play a crucial role in moisture control by removing excess humidity from the air. When you take a shower or bath, moisture from the hot water evaporates into the air, creating a humid environment in the bathroom. Without proper ventilation, this moisture can linger in the air, leading to a host of problems:
- Paint Peeling: Excess moisture can cause paint to peel off walls and ceilings. Moisture seeps into porous surfaces, weakening the adhesion of paint and causing it to bubble, crack, or peel over time.
- Metal Rusting: Metal fixtures and fittings in the bathroom, such as faucets, towel racks, and light fixtures, are vulnerable to corrosion when exposed to high levels of moisture. Rust not only detracts from the aesthetic appeal of these fixtures but also compromises their structural integrity, leading to potential leaks or failures.
- Wood Warping: Wooden surfaces, including cabinets, door frames, and trim, can absorb moisture from the air, causing them to swell, warp, or rot. This not only affects the appearance of the wood but also compromises its structural integrity, leading to costly repairs or replacements.
- Mold and Mildew Growth: Perhaps the most concerning consequence of excess moisture is the growth of mold and mildew. Mold thrives in warm, humid environments and can quickly spread on surfaces such as walls, ceilings, grout, and caulk. In addition to being unsightly, mold and mildew can cause respiratory problems, allergic reactions, and exacerbate existing health conditions such as asthma and allergies.
Regularly cleaning your bathroom fan helps to prevent these issues by ensuring that moisture is promptly and efficiently removed from the air, reducing the risk of paint damage, metal corrosion, wood deterioration, and mold growth.
Energy Efficiency and Cost Savings
In addition to preserving the integrity of your home, maintaining a clean bathroom fan can lead to energy savings and lower utility bills. When dust and debris accumulate on the fan blades and motor, airflow is restricted, causing the fan motor to work harder to expel air from the bathroom. This increased workload not only consumes more electricity but also puts unnecessary strain on the motor, potentially leading to premature failure or malfunction.
By regularly cleaning your bathroom fan, you can ensure that it operates at peak efficiency, expelling moisture and odors from the bathroom with minimal energy consumption. This not only reduces your environmental footprint but also saves you money on your monthly energy bills.
Longevity of the Fan and Reduced Maintenance Costs
A clean bathroom fan is less likely to experience mechanical problems or failures, resulting in fewer repair and maintenance costs over time. Dust and debris that accumulate on the fan blades, motor, and housing can cause friction, overheating, and premature wear and tear on components. This can lead to motor burnout, bearing failure, or electrical issues, necessitating costly repairs or replacements.
By regularly cleaning your bathroom fan and performing routine maintenance tasks, such as lubricating moving parts and inspecting electrical connections, you can prolong the lifespan of the fan and reduce the likelihood of expensive repairs or replacements. Investing a little time and effort in cleaning your bathroom fan now can save you money and hassle in the long run.
Factors Influencing Cleaning Frequency

Usage Patterns
The frequency of cleaning your bathroom fan is significantly influenced by how often the bathroom is used. If your bathroom experiences heavy usage, such as multiple showers or baths per day, the fan will be exposed to higher levels of moisture and airborne particles. Consequently, it may require more frequent cleaning to maintain optimal performance. Conversely, bathrooms that are used less frequently may accumulate dirt and debris at a slower rate, necessitating less frequent cleaning.
Environmental Conditions
Environmental factors such as humidity levels, ventilation, and air quality can impact how quickly dust and debris accumulate on your bathroom fan. Homes located in humid climates or areas with poor ventilation may experience higher levels of moisture in the air, leading to faster buildup of mold, mildew, and dust on the fan. Similarly, homes situated in dusty or polluted environments may require more frequent cleaning to prevent the accumulation of airborne particles on the fan blades and motor.
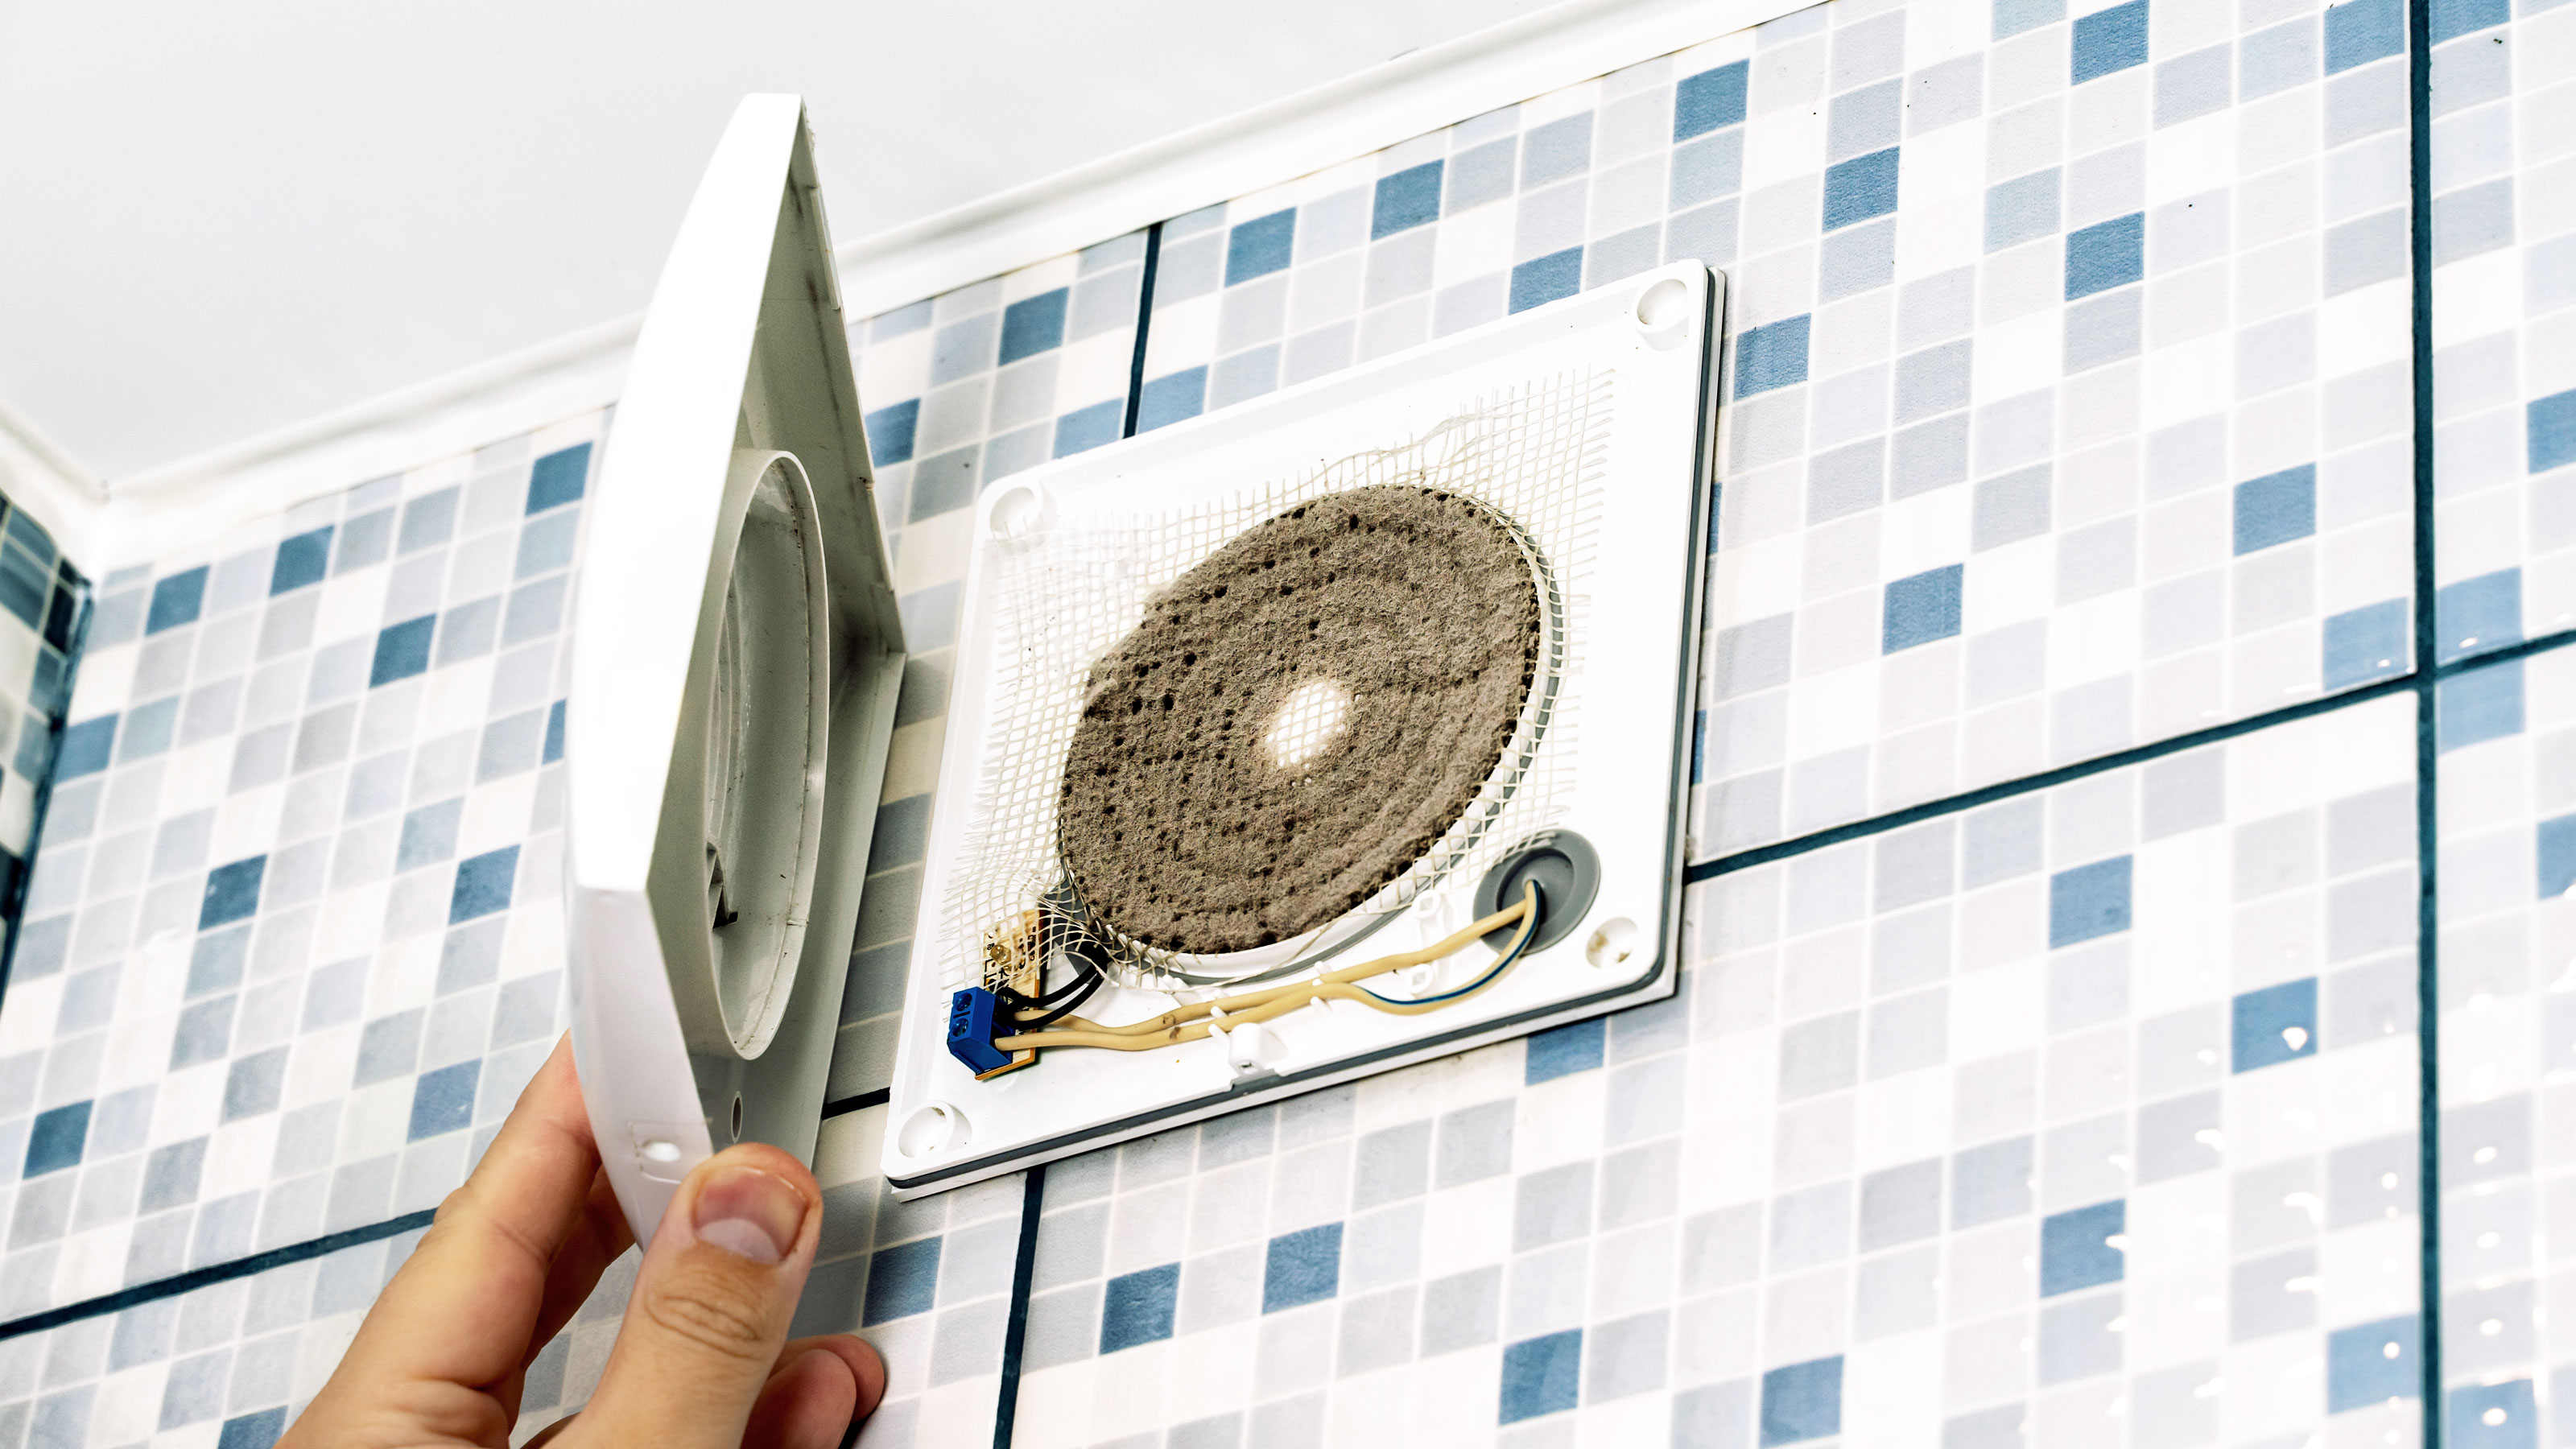
Visible Dirt Accumulation
One of the most straightforward indicators of when to clean your bathroom fan is visible dirt or dust accumulation on the vent cover or fan blades. Regular visual inspections of the fan can help you identify when cleaning is necessary. If you notice a layer of dust or debris on the vent cover or fan blades, it’s a good indication that the fan needs cleaning. By addressing visible dirt buildup promptly, you can prevent it from accumulating to levels that impede airflow and compromise the fan’s performance.
Seasonal Considerations
Cleaning frequency may also vary seasonally based on changes in environmental conditions. For example, homes may experience higher humidity levels during the summer months, resulting in increased moisture accumulation in bathrooms and faster buildup of mold, mildew, and dust on exhaust fans. In regions with distinct seasonal changes, you may need to adjust your cleaning schedule accordingly to account for fluctuations in humidity, ventilation, and airborne particles.
Personal Preference and Sensitivity
Individual preferences and sensitivities to indoor air quality may also influence how often you choose to clean your bathroom fan. Some individuals may be more sensitive to allergens, dust, and odors in the air and may prefer to clean their bathroom fan more frequently to maintain a cleaner and healthier environment. Similarly, homeowners with respiratory conditions such as asthma or allergies may benefit from more frequent cleaning to minimize exposure to airborne irritants and allergens.
Recommended Cleaning Schedule
:max_bytes(150000):strip_icc()/How-to-Clean-a-Dusty-Bathroom-Fan-8419-09-bea27a1488e644e1988768fe60b67eb1.jpg)
Routine Maintenance
Routine maintenance is essential for ensuring that your bathroom fan operates efficiently and effectively. A regular cleaning schedule helps prevent the buildup of dust, dirt, and moisture that can impede airflow and compromise the fan’s performance. Here’s a suggested cleaning schedule:
Every Six Months:
Perform a thorough cleaning of the vent cover and fan blades every six months to remove accumulated dust and debris. This semi-annual cleaning helps maintain optimal airflow and prevents dirt from accumulating to levels that can hinder the fan’s performance.
Annually:
In addition to semi-annual cleanings, it’s recommended to perform a more comprehensive cleaning of the fan motor and internal components on an annual basis. This annual cleaning helps ensure that the fan operates smoothly and efficiently year-round. Here’s what to include in your annual cleaning routine:
- Disassemble the Fan: If possible, disassemble the fan motor assembly to access the internal components for cleaning. This may involve removing screws or clips to detach the fan blades and motor from the housing.
- Clean the Motor and Fan Blades: Use a vacuum with a brush attachment to remove dust and debris from the motor and fan blades. Pay special attention to any hard-to-reach areas where dirt may accumulate. For stubborn dirt, you can use compressed air or a soft-bristled brush to loosen and remove buildup.
- Inspect for Wear and Tear: While cleaning the fan, take the opportunity to inspect the motor, bearings, and other components for signs of wear and tear. Look for any loose or damaged parts that may need repair or replacement.
- Lubricate Moving Parts: If applicable, lubricate the bearings and other moving parts of the fan motor according to the manufacturer’s recommendations. Proper lubrication helps reduce friction and prolongs the lifespan of the fan.
- Reassemble and Test: Once all components are clean and dry, reassemble the fan and reinstall it in the bathroom. Restore power at the circuit breaker and test the fan to ensure it operates smoothly and quietly.
Visual Inspection
In addition to following a regular cleaning schedule, it’s essential to conduct regular visual inspections of your bathroom fan to check for signs of dirt or obstruction. Periodically check the vent cover and fan blades for visible dust buildup or reduced airflow. If you notice any accumulation of dirt or a decrease in performance, it may be necessary to clean the fan more frequently.
Seasonal Considerations
Consider adjusting your cleaning schedule based on seasonal changes in humidity and ventilation. Homes may experience higher humidity levels during the summer months, leading to increased moisture accumulation in bathrooms and faster dirt buildup on exhaust fans. In contrast, drier winter months may require less frequent cleaning as moisture levels decrease.
How to Clean Your Bathroom Fan
Step 1: Turn Off Power
Before you begin cleaning your bathroom fan, it’s essential to turn off power at the circuit breaker to prevent the risk of electrical shock. Locate the circuit breaker that controls the power to the bathroom and switch it off.
Step 2: Remove Vent Cover
Use a screwdriver to remove the screws holding the vent cover in place. Depending on the design of your vent cover, you may need to remove spring-loaded clips or other fasteners. Once the screws are removed, gently pull the vent cover away from the ceiling or wall to expose the fan blades and motor.
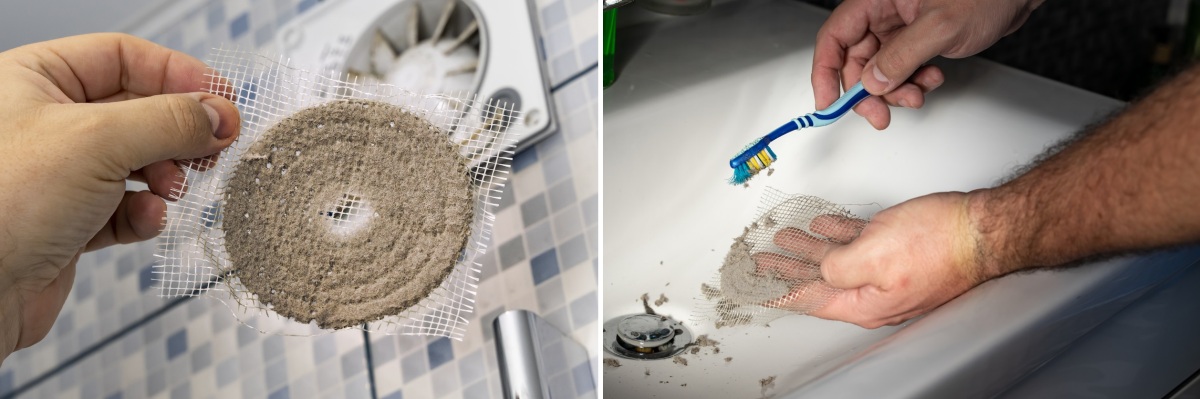
Step 3: Clean Vent Cover
Once the vent cover is removed, use a vacuum with a brush attachment to remove loose dust and debris from both sides of the cover. If the cover is particularly dirty, you can wash it with warm, soapy water and a soft sponge or cloth. Be sure to rinse the cover thoroughly and allow it to air dry completely before reinstalling.
Step 4: Clean Fan Blades and Motor
If possible, remove the fan blades and motor assembly from the housing for thorough cleaning. Use a vacuum with a brush attachment to remove dust and debris from the blades and motor housing. Pay close attention to any hard-to-reach areas where dirt may accumulate.
For stubborn dirt or grease buildup, you can use a mild detergent or degreaser to clean the blades and motor housing. Be sure to dry the components thoroughly before reassembly to prevent moisture damage.
Step 5: Clean Housing
While the fan blades and motor are removed, take the opportunity to clean the inside of the fan housing. Use a vacuum with a brush attachment to remove any accumulated dust and debris from the interior surfaces of the housing. Pay special attention to corners and crevices where dirt may collect.
If necessary, you can use a mild detergent or cleaning solution to remove stubborn dirt or stains from the housing. Be sure to rinse thoroughly and dry completely before reassembling the fan.
Step 6: Reassemble and Test
Once all components are clean and dry, reassemble the fan by reversing the disassembly process. Secure the fan blades and motor assembly back into the housing, and reinstall the vent cover using the screws or fasteners removed earlier.
After reassembly, restore power at the circuit breaker and test the fan to ensure it operates smoothly and quietly. Listen for any unusual noises or vibrations that may indicate a problem with the fan motor or components.
Conclusion
Maintaining a clean bathroom exhaust fan is essential for controlling moisture, preventing mold growth, and prolonging the lifespan of the fan. By following a regular cleaning schedule and performing routine maintenance tasks, you can ensure your bathroom fan operates efficiently and effectively for years to come. Remember to adjust your cleaning frequency based on usage, environmental conditions, and visible dirt accumulation, and always prioritize safety by turning off power before cleaning. With proper care and maintenance, your bathroom fan will continue to provide reliable ventilation and enhance the comfort and safety of your home.