In today’s modern bathrooms, LED mirrors have become a popular choice due to their stylish design and practicality. Installing an LED bathroom mirror might seem like a daunting task, but with the right guidance and tools, it can be a straightforward process. In this comprehensive guide, we will walk you through each step of the installation process, ensuring that you can achieve a professional-looking result with ease.
Introduction to LED Bathroom Mirrors

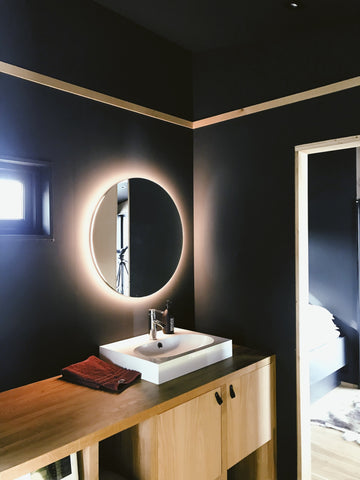
LED bathroom mirrors are not only functional but also add a touch of sophistication to any bathroom space. These mirrors come in various shapes, sizes, and designs, allowing homeowners to choose the perfect fit for their bathroom decor. From small round mirrors to large rectangular ones, the options are endless.
Why Choose LED Bathroom Mirrors?
LED bathroom mirrors offer several advantages over traditional mirrors:
- Energy Efficiency: LED lights consume less energy compared to traditional lighting options, making them cost-effective and environmentally friendly.
- Even Lighting: LED lights provide uniform illumination, ensuring that every corner of the bathroom is well-lit.
- Longevity: LED bulbs have a longer lifespan compared to incandescent or fluorescent bulbs, reducing the need for frequent replacements.
- Modern Aesthetic: LED mirrors add a contemporary touch to any bathroom, enhancing its overall appearance.
Now that we understand the benefits of LED bathroom mirrors, let’s delve into the installation process.
Step-by-Step Guide to Installing an LED Bathroom Mirror

1. Gather Necessary Tools and Equipment
Before beginning the installation process, it’s essential to gather all the tools and equipment you’ll need:
- Tape measure
- Pencil
- Spirit level
- Screwdriver
- Masking tape
- Drill or hammer drill (depending on wall material)
- Screws and wall plugs
- Safety wear (hearing protection, protective gloves, dust mask, safety goggles)
2. Prepare the Workspace
- Clearing the Area: Start by removing any objects or clutter from the area where the mirror will be installed. This includes toiletries, decorations, or any other items that may obstruct your workspace. Clearing the area provides you with ample space to work and minimizes the risk of accidents or damage to your belongings during the installation process.
- Laying Out Tools and Equipment: Lay out all the tools and equipment you’ll need for the installation. This includes items such as a tape measure, pencil, spirit level, screwdriver, drill, screws, wall plugs, and safety gear. Having everything readily accessible ensures that you can work efficiently without interruptions.
- Protecting Surfaces: Depending on the surface where you’ll be working, it may be necessary to take precautions to protect it from damage. For example, if you’re installing the mirror on a delicate surface such as tile or marble, consider using masking tape to mark drill points and prevent chipping or scratching.
- Ensuring Adequate Lighting: Good lighting is essential for precision work. Make sure the workspace is well-lit either by natural light or by using additional lighting sources such as lamps or overhead lights. Adequate lighting will help you accurately measure, mark, and install the mirror brackets.
3. Install Mirror Brackets
- Marking the Positions: Start by using a tape measure and pencil to mark the positions for the mirror brackets on the wall. It’s essential to measure carefully and ensure that the brackets will be placed at the correct height and distance apart to properly support the mirror.
- Checking for Level: Once you’ve marked the positions for the brackets, use a spirit level to ensure that the marks are level. This step is crucial for ensuring that the mirror will be properly aligned when it is installed.
- Drilling Pilot Holes: Use a drill or hammer drill (depending on the wall material) to drill pilot holes for the screws that will secure the brackets to the wall. Be sure to use the appropriate drill bit size for the wall plugs you’ll be using.
- Inserting Wall Plugs: After drilling the pilot holes, insert wall plugs into the holes. Wall plugs provide additional support and stability for the screws, especially in materials like plasterboard or drywall.
- Attaching the Brackets: With the wall plugs in place, attach the mirror brackets to the wall using screws. Make sure the brackets are securely fastened to the wall and that they are level.
- Checking Alignment: Before proceeding further, double-check the alignment of the mirror brackets to ensure they are positioned correctly. Use the spirit level to confirm that the brackets are level and properly aligned with each other.
- Testing Stability: Once the brackets are installed, test the stability by applying gentle pressure to them. They should feel secure and stable, with no wobbling or movement.
4. Hire a Qualified Electrician
- Electrical Expertise: Electricians undergo extensive training and certification to become proficient in handling electrical wiring and installations. They have the knowledge and expertise required to ensure that the wiring is done safely and in compliance with building codes and regulations.
- Safety Compliance: Wiring electrical fixtures in a bathroom requires adherence to specific safety regulations, including those outlined in Part P of the Building Regulations. These regulations are in place to protect against the risk of electric shock, fire hazards, and other safety concerns. A qualified electrician will ensure that the wiring is done in compliance with these regulations, reducing the risk of accidents or hazards.
- Certification and Compliance: When you hire a qualified electrician, you can expect to receive certification for the electrical work carried out. This certification serves as proof that the installation has been completed by a competent professional and meets all safety and regulatory requirements. Having proper certification is essential, especially if you plan to sell your home in the future, as it demonstrates that the electrical work has been done to a high standard.
- Avoid DIY Risks: Attempting to wire the LED lights yourself without the necessary expertise can be dangerous and may result in electrical hazards or damage to the mirror or wiring. DIY electrical work also carries the risk of voiding warranties or insurance coverage if something goes wrong. By hiring a qualified electrician, you can avoid these risks and ensure that the installation is done safely and correctly.
5. Install and Test the Mirror
- Positioning the Mirror: Start by positioning the mirror onto the brackets that have been securely installed on the wall. Ensure that the mirror is level and properly centered over the basin or sink. This step is crucial for achieving a visually appealing and symmetrical installation.
- Securing the Mirror: Depending on the design of the mirror and brackets, it may be necessary to secure the mirror in place using screws or other fastening mechanisms. Follow the manufacturer’s instructions carefully to ensure that the mirror is properly secured and stable on the wall.
- Checking Alignment: Once the mirror is in place, double-check its alignment to ensure that it is level and properly centered. Use a spirit level to verify that the mirror is not tilted or uneven. Proper alignment is essential for achieving a polished and professional-looking installation.
- Testing the Lights: After installing the mirror, it’s time to test the LED lights to ensure they are functioning correctly. Turn on the lights and observe the illumination to ensure that it is uniform and consistent across the surface of the mirror. Check for any flickering or dim spots that may indicate a wiring issue or defect.
- Adjustments (if necessary): If you encounter any issues during the testing phase, such as uneven lighting or electrical problems, it may be necessary to make adjustments or troubleshoot the installation. This could involve repositioning the mirror, checking the wiring connections, or contacting a professional electrician for assistance.
- Final Inspection: Once the mirror is installed and the lights have been tested, perform a final inspection to ensure that everything is in order. Check for any visible defects, such as scratches or damage to the mirror surface, and address any issues promptly.
Alternative Solutions: Battery-Powered LED Lights
If hiring an electrician is not feasible, there are alternative solutions available, such as battery-powered LED lights:
- Battery-Powered LED Strips: These can be installed beneath the mirror to provide illumination without the need for wiring.
- Battery-Powered LED Mirrors: Some mirrors come with integrated battery-powered LED lights, offering a convenient lighting solution.
Before opting for battery-powered lights, it’s essential to ensure that they have the correct IP rating for bathroom use and that they provide adequate illumination.
Conclusion
Installing an LED bathroom mirror is a manageable task that can enhance the aesthetics and functionality of any bathroom. By following the steps outlined in this guide and seeking professional assistance when needed, you can achieve a beautifully illuminated bathroom space that meets your needs and preferences. Whether you choose to wire the lights or opt for battery-powered alternatives, an LED mirror is sure to elevate your bathroom experience.